Backyard Ice Rink vs Roller Rink: Which Should You Build?
Compare backyard ice and roller rinks by climate, base, installation, maintenance, season length, and practical tradeoffs before choosing a build.
USA Skating Rinks Editorial Team
Updated May 29, 2026 · Editorial policy
A backyard skating rink can be a seasonal ice surface fed by winter temperatures or a year-round roller surface built on a hard pad. The construction methods, costs, and maintenance routines are very different. This comparison helps you choose between those paths using specifications drawn from established rink manufacturers and instructional sources.
Decide First: Ice or Roller?
The choice usually comes down to climate and how often the rink will be used.
- Ice rinks require sustained below-freezing daytime temperatures. Tarp Supply’s build guide notes that a skateable surface of about three inches of ice typically forms after three or four days under 20°F. In milder climates, the window is too short to justify the setup.
- Roller rinks work in any climate but need a flat, hard base — concrete, asphalt, or compacted stone — because outdoor sport tiles cannot be installed directly on grass.
For finding indoor alternatives or local rinks during off-season months, the skating rinks directory lists facilities by region.
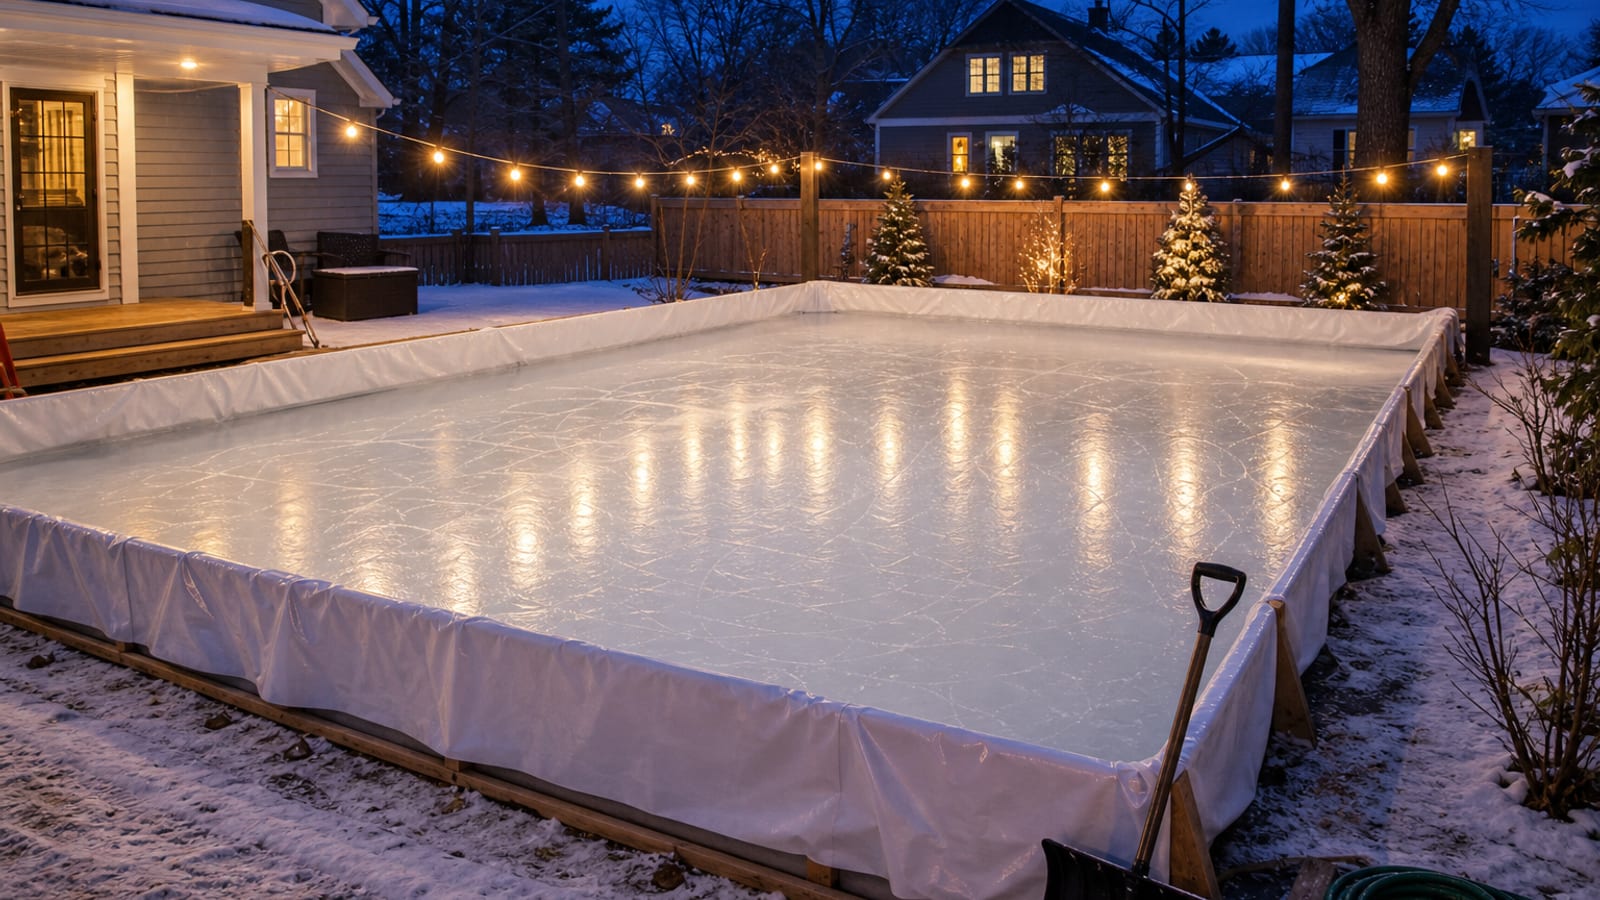
Building a Backyard Ice Rink
1. Pick and Measure the Site
How To Hockey recommends a flat area near the house, close to an outdoor water source, away from any septic field or leach lines, and with adequate lighting. Before buying materials, measure the slope using stakes, a string line, and a line level. Slope dictates how tall your boards need to be on the low end: water self-levels, so a yard that drops six inches across the rink footprint will hold six more inches of water on the downhill side than the uphill side.
2. Choose a Board System
Two of the most established kit makers are NiceRink and Iron Sleek.
| System | Board material | Board height | Bracket material |
|---|---|---|---|
| NiceRink | Heavy-duty plastic | 4 ft (offseason-storable) | Plastic, ground-press |
| Iron Sleek Poly Steel | 1/2 in HDPE | 20 in standard; 42 in tall option | Carbon steel |
Iron Sleek specifies its brackets are sized to hold up to 18 inches of water and that boards are typically spaced on 4-foot centers. Corners are reinforced with dedicated corner brackets in both systems.
3. Install the Frame
Run a string line and mark the perimeter. Set corners first, then work outward. Iron Sleek’s standard Poly Steel board is 4 ft long with a 2.375-inch lap joint that locks adjacent boards together; brackets are driven into the ground at each joint. On a hard surface like a patio or pond, Iron Sleek offers a hard-court bracket variant.
4. Lay the Liner — Only When You’re Ready to Fill
Tarp Supply recommends the liner be 4–5 feet longer and wider than the frame on each side, so excess can drape over the boards and protect the brackets during thaws. Critically, both NiceRink and How To Hockey advise against laying the liner early: debris, animals, and UV can damage it before water ever hits. Wait until below-freezing daytime temperatures are forecast for the following week.
5. Fill in One Pass
Fill the rink in a single session. Layered filling traps pressure between ice sheets and can split the liner. Many builders use a bulk water delivery service for this reason. Tarp Supply specifies a minimum of 4 inches of water at the lowest point and warns the water must never overflow the boards.
6. Maintain the Ice
- Snow removal: Shovel, blow, or sweep snow off as soon as it falls. Snow insulates the ice underneath and slows freezing.
- Resurfacing: Sweep loose debris, then flood with a thin layer of hot water using a homemade resurfacer or a commercial unit such as the NiceRink NiceIce. Resurface at night when temperatures bottom out.
- Verify thickness before skating: Tarp Supply recommends confirming roughly 3 inches of solid ice before anyone steps on.
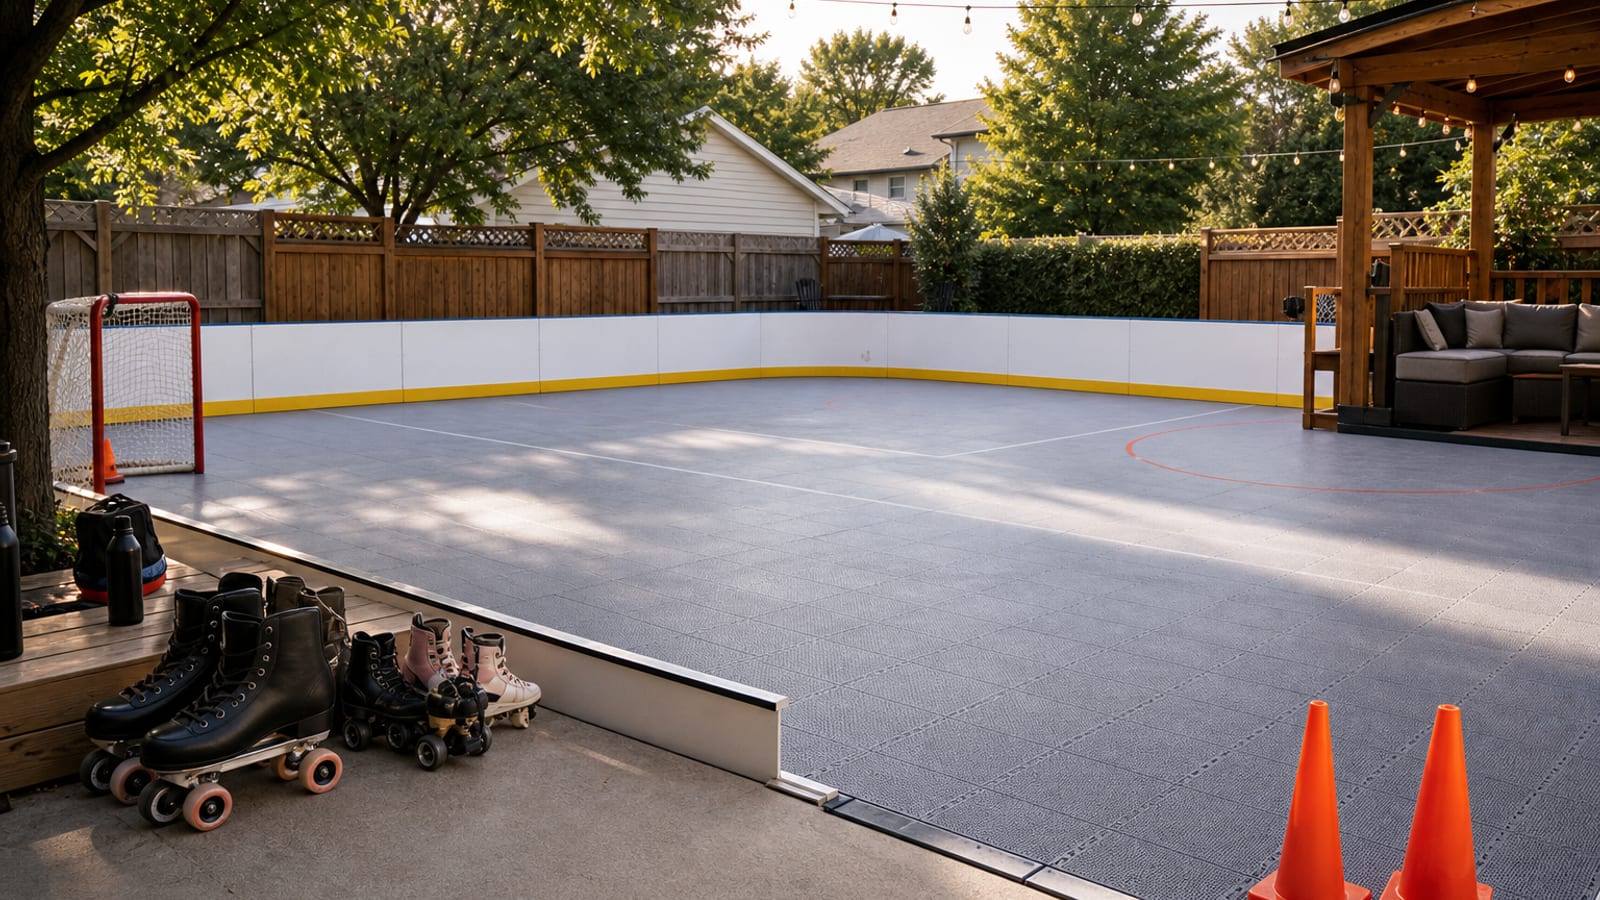
Building a Backyard Roller Rink
A roller rink is a one-time hard-surface install rather than a seasonal flood-and-freeze ritual.
1. Prepare the Base
Outdoor sport tile manufacturers including VersaCourt and Matéflex require a flat, hard base — concrete, asphalt, or in some cases compacted crushed stone with a foundation panel. Grass is not a supported base. The base should drain because the tile surface relies on the pad below to shed water.
2. Choose Tile
Outdoor roller hockey and skating tiles are typically molded from solid polypropylene with an open underside that lets water drain through. VersaCourt markets its outdoor surface as running up to 50% cooler than bare concrete or asphalt, with a suspended structure that reduces joint impact compared to a solid slab.
3. Snap and Square the Tiles
VersaCourt tiles snap together without adhesive or fasteners, and outdoor sport tiles generally interlock with hidden tabs so the seams stay tight. Start in one corner and work outward, checking square every few rows. A tile install for a small backyard surface can usually be finished in a day once the pad is ready.
4. Maintain the Surface
Tile rinks are largely maintenance-free — no waxing, no resurfacing. Drainage holes mean an outdoor surface is typically dry within a couple of hours of rain. Sweep debris periodically and re-tighten any tiles that shift over time.
For inspiration on full-size roller surfaces and where to skate during the build, browse roller rinks in Michigan.
Realistic Budget Notes
Specific kit pricing changes regularly, but several order-of-magnitude facts are stable: ice rink kits scale by perimeter (more boards, more brackets, a larger liner), liners are sold by overall footprint plus 4–5 feet of overhang per side per Tarp Supply, and roller tile costs scale by square footage of the pad. For both rink types, the largest hidden cost is usually site prep — leveling a yard for ice or pouring/expanding a slab for roller tiles.
FAQ
How cold does it need to be to freeze a backyard ice rink?
Tarp Supply’s guide notes that a solid 3 inches of ice typically forms after three to four days of temperatures under 20°F. Daytime highs need to stay below freezing during the initial fill for the rink to set up properly.
Can I put a roller rink directly on grass?
No. Outdoor sport tile manufacturers require a flat, hard base such as concrete, asphalt, or compacted stone. Grass moves, holds moisture, and prevents the tiles from interlocking flat.
How tall do the boards need to be?
That depends on your yard’s slope. Iron Sleek’s standard Poly Steel boards are 20 inches tall and rated for up to 18 inches of water; a 42-inch tall option exists for sloped lots. Measure the slope across the rink footprint and choose board height that keeps water at least a few inches below the top rail.
Sources
- NiceRink — Installation Instructions — board system, plastic 4-ft boards, NiceIce resurfacer
- Tarp Supply — Backyard Ice Rink Building Guide — liner overhang, 4-inch minimum water depth, 3-inch ice in 3–4 days under 20°F, overflow warning
- Iron Sleek — Backyard Rink Components — carbon steel brackets, 18-inch water rating, Poly Steel board dimensions and heights, 4-ft bracket spacing
- How To Hockey — How to Build a Backyard Hockey Rink — site selection, slope measurement, liner timing, single-fill rule, snow removal, resurfacing
- VersaCourt — Residential & Backyard Hockey Rinks — snap-together polypropylene tiles, cooler-than-concrete claim, suspended surface
- Mat Supplier — Outdoor Roller Hockey Sports Tiles — solid polypropylene construction, base requirement (no grass), drainage